
Disclaimer! Changing your oil can be dangerous! You will lift a heavy vehicle off the ground and be under it. Please observe all precautions when changing your oil. I am not liable for any injuries received from people misusing the information contained in this post.
The Quartermile: What you need to know
Ramps are much easier and safer for raising your car than a jack and jack stands. (block behind rear wheels)
A filter wrench is the correct tool for removing an oil filter. Install new filter ¼-½ turn after tight, by hand.
A drain pan with a spout is much cleaner than an open drain pan.
It’s best to have a friend who’s knowledgeable about cars help you the first time you attempt to change your oil if you never have before. Don’t ruin your car! If you are unsure, ask.
Emails can be sent to hooglandaxel@gmail.com or the comment section below.
By this time, if you’ve been reading, along you’ve attended a few events hopefully and hopefully bought a new vehicle (or you would have had I released these posts in the order I originally wrote them. On that note look for a future “How to buy a car” post). Now it’s time to make sure your new car is ready to go. One way to get intimate with your car is an oil change. Hopefully you referred to my last post and when you bought your new car you asked the seller when the last oil change was, then you should be aware if you car is due. Even if it’s not due yet, it will definitely need an oil change sooner or later. (If I had released that post yet)
The oil change is one of the best ways to get to know your car. It is also one of the easiest ways to work on your car and feel like you’ve really accomplished something.
Like any work, I find it easiest to handle the oil change in two stages.
Stage 1: Gather all supplies
Stage 2: Actually change the oil
You will need a good list of things to change your car’s oil. Some are nice and some are necessary. Oil is necessary, ramps are nice but not necessary.
Necessary:
New Oil (refer to your car manual for the weight of oil, ex 10w-40, conventional or synthetic)
New Filter
a way to lift the car off the ground (Lift, ramps, jack stands/jack/wheels)
socket to remove drain pan plug (Make sure it’s the right size!)
Oil filter wrench (this is not actually necessary but it’s definitely the best way to remove the filter, actually no it’s necessary)
drain pan
Really really nice to have:
clean rags
Ramps
First you will need to get your vehicle in the air. I have been making due with using my wheel changing scissor jack and jack stands. This is a much more difficult and time consuming way to do this. The nicest way, in your parking lot, is to use ramps. They are fast and relatively inexpensive. If you do use a jack the safest way to secure the car in the air is to put another set of tires under the car’s front tires. It’s nearly impossible for the car to fall off a tire. If you don’t have tires, jack stands are also very good. You should also have your park brake on, the vehicle in park and a block behind your rear tires, all to prevent the vehicle rolling away. Safety First!
Now you are ready to drain the oil . Make sure to have an oil drain pan under the drain plug and offset in the direction that the oil will shoot out. Here is a good place to mention the benefits of a drain pan that is enclosed and has a spout to help you pour out the oil.

Drain pain with spout
This is a great benefit over a simple open pan. When pouring from these pans you will, without a doubt, get oil all over the ground, your feet, and whatever you are pouring into. To Loosen the drain plug, first make sure you have the correct size socket/wrench. Turn counterclockwise to loosen the nut. Turn it a few turns and then it will be best to finish removing it by hand. You will want to turn the plug counterclockwise but keep pushing it into the pan, sealing as much oil in as you can until it is completely unthreaded. Once the plug is completely unthreaded, pull it away fast and get as little oil on your hand as possible, this is quite the feat.

Stripped oil drain pan bolt (from a friend, not me!)
Next you will want to remove the oil filter. There are 2 main types of filters. Historically most vehicles used external filters, and these are still very common. More recently there are cartridge filters. These are often easier to change and less messy. For external filters, there are multiple wrong ways to go about removing this part. It is possible to use a large channel locks to grab the filter. You can also stab a screwdriver through the filter and turn using that. Both of these methods will ultimately cause you more trouble than good. You will likely puncture the filter and make a big mess with oil everywhere and expose yourself to sharp surfaces on the filter. The correct way to remove the filter is using a filter wrench. Some filters have a large socket built into the bottom of the filter. These can be good, but personally I have always had good luck with the strap style filter wrench.
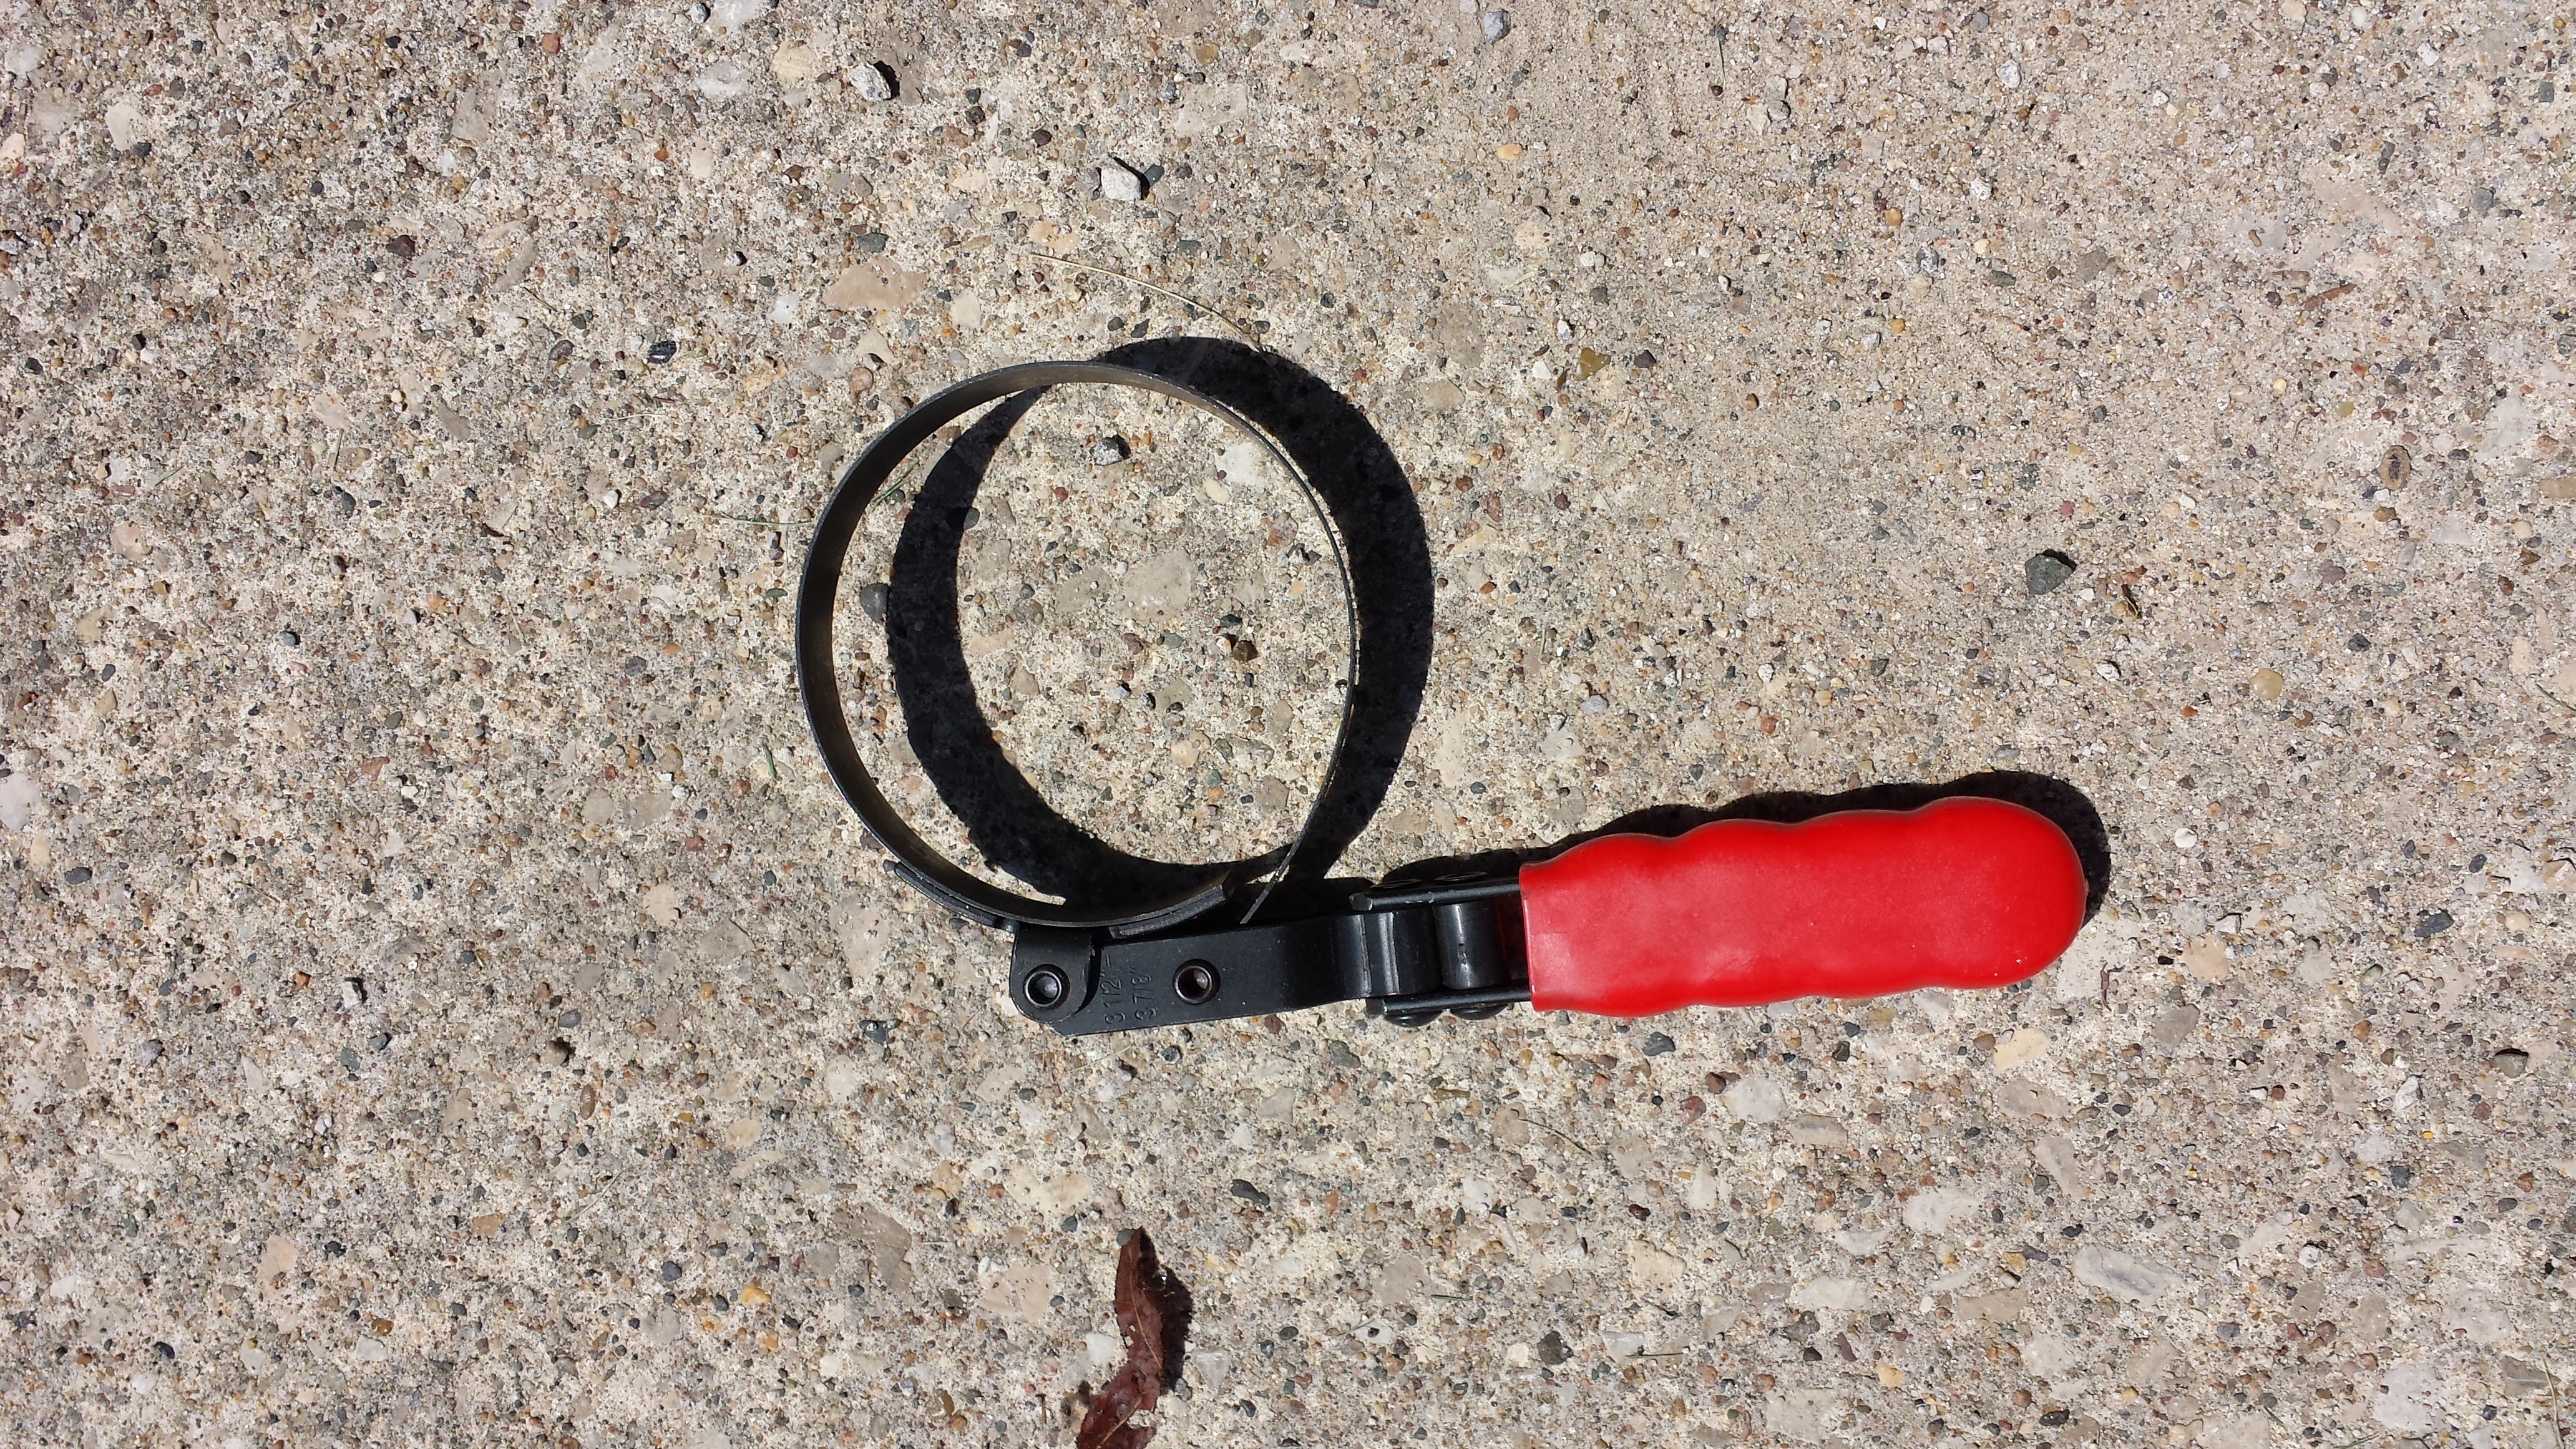
Filter wrench
Filters also come in different sizes, so when buying a filter wrench make sure it fits your filter! Make sure you have a drain pan under the oil filter to catch oil. You will want to turn the filter a few times counter clock wise to get it loose. Then, like the drain plug, spin until loose while pushing up and once it is loose control the filters fall to the drain pan.
Now to install the new filter. First you will want to let all the oil drain out. I like to wipe off the seating surface on the engine block with a clean rag. You will want to smear some of the new oil on the sealing ring (on the filter) to ensure a good seal. Then spin the filter back on until snug, then turn between ¼ and ½ a turn, by hand. This is all the tighter the filter needs to be reinstalled. It should be snug but not so tight it is squeezing the seal out, creating a leak. This is one area where changing your own oil is good. Often a shop will over tighten the filter to where it’s nearly impossible to remove! This is to cover themselves as it’s better, for them,if it doesn’t come off than if it falls off. Same goes for the drain pan plug for that matter.
By now all of the oil should have drained out of your car. You can remove the oil and put the drain pan plug back in. Make sure to wipe all the oil off the pan. Start threading the plug back in BY HAND. In fact this is a good place to mention that all nut/bolts should always be started by hand and tightened as much as possible this way to avoid cross threading. There should be a torque spec for the pan plug. Often to snug and then ¼ to ½ is good. As you work on your car more you will definitely develop a feel for tightening nuts eventually and for most general nuts/bolts you should develop a “calibrated” hand so you shouldn’t need a torque wrench unless it’s an important vehicle part, like a head on the engine. You definitely don’t want to over tighten this bolt as you will strip the thread which will lead to an oil pan change. If you are at a level where you are tempted to tighten the pan plug til you are stripping the threads, you probably aren’t ready to perform an oil pan replacement. It’s probably best to practice tightening a bolt in a nut held in in a vise if you have never tightened a bolt in your life.
After you have put the filter and plug back in you are ready to fill the vehicle with nice new oil. I always use a small funnel to direct the oil back into the engine and not get it all over the engine!

funnel to fill crankcase
Refer to your owners manual for the right amount of oil for your vehicle. After you have filled it and looked that there are no leaks I prefer to put the car back on the ground. I then start the car and let it run a minute or two. This gets the oil filter filled and the oil level correct. Let the vehicle sit a few minutes while you clean up. You can then check the oil level.
An important thing to do after changing your oil is to make a log of when you changed it so you know when to change it again, this gets especially important when you have multiple vehicles. I personally use duct tape and a magic marker and place it over the old reminder. I also like to put the date on so I remember that. I prefer to mark the mileage when I changed the oil, as opposed to most stops put when the next change is due. I tend to go over the recommended 3,000 miles (for older cars). Some new cars can go to 15,000+. I prefer to know how many miles I have on the oil as opposed to when it “should” be changed. They intervals are different for every vehicle and engine so do your homework, check your owners manual, ask your friends, or ask me in the comments below.
I personally keep an excel document of all the work I do to each vehicle (since I have 6 vehicles), each gets it’s own page. Mileage done at, date, and maintence done. I find this the best way to know what needs to be done next.
Lastly you will need to dispose of your old oil. Remember the drain pan with a spout? This is where it will help you in putting the old oil back into the quart/5 quart bottles the new oil came in. Once you have poured the old oil in, make sure to mark the bottle on the top “Bad/used oil”. You will not likely be returning it that day to the disposal place.
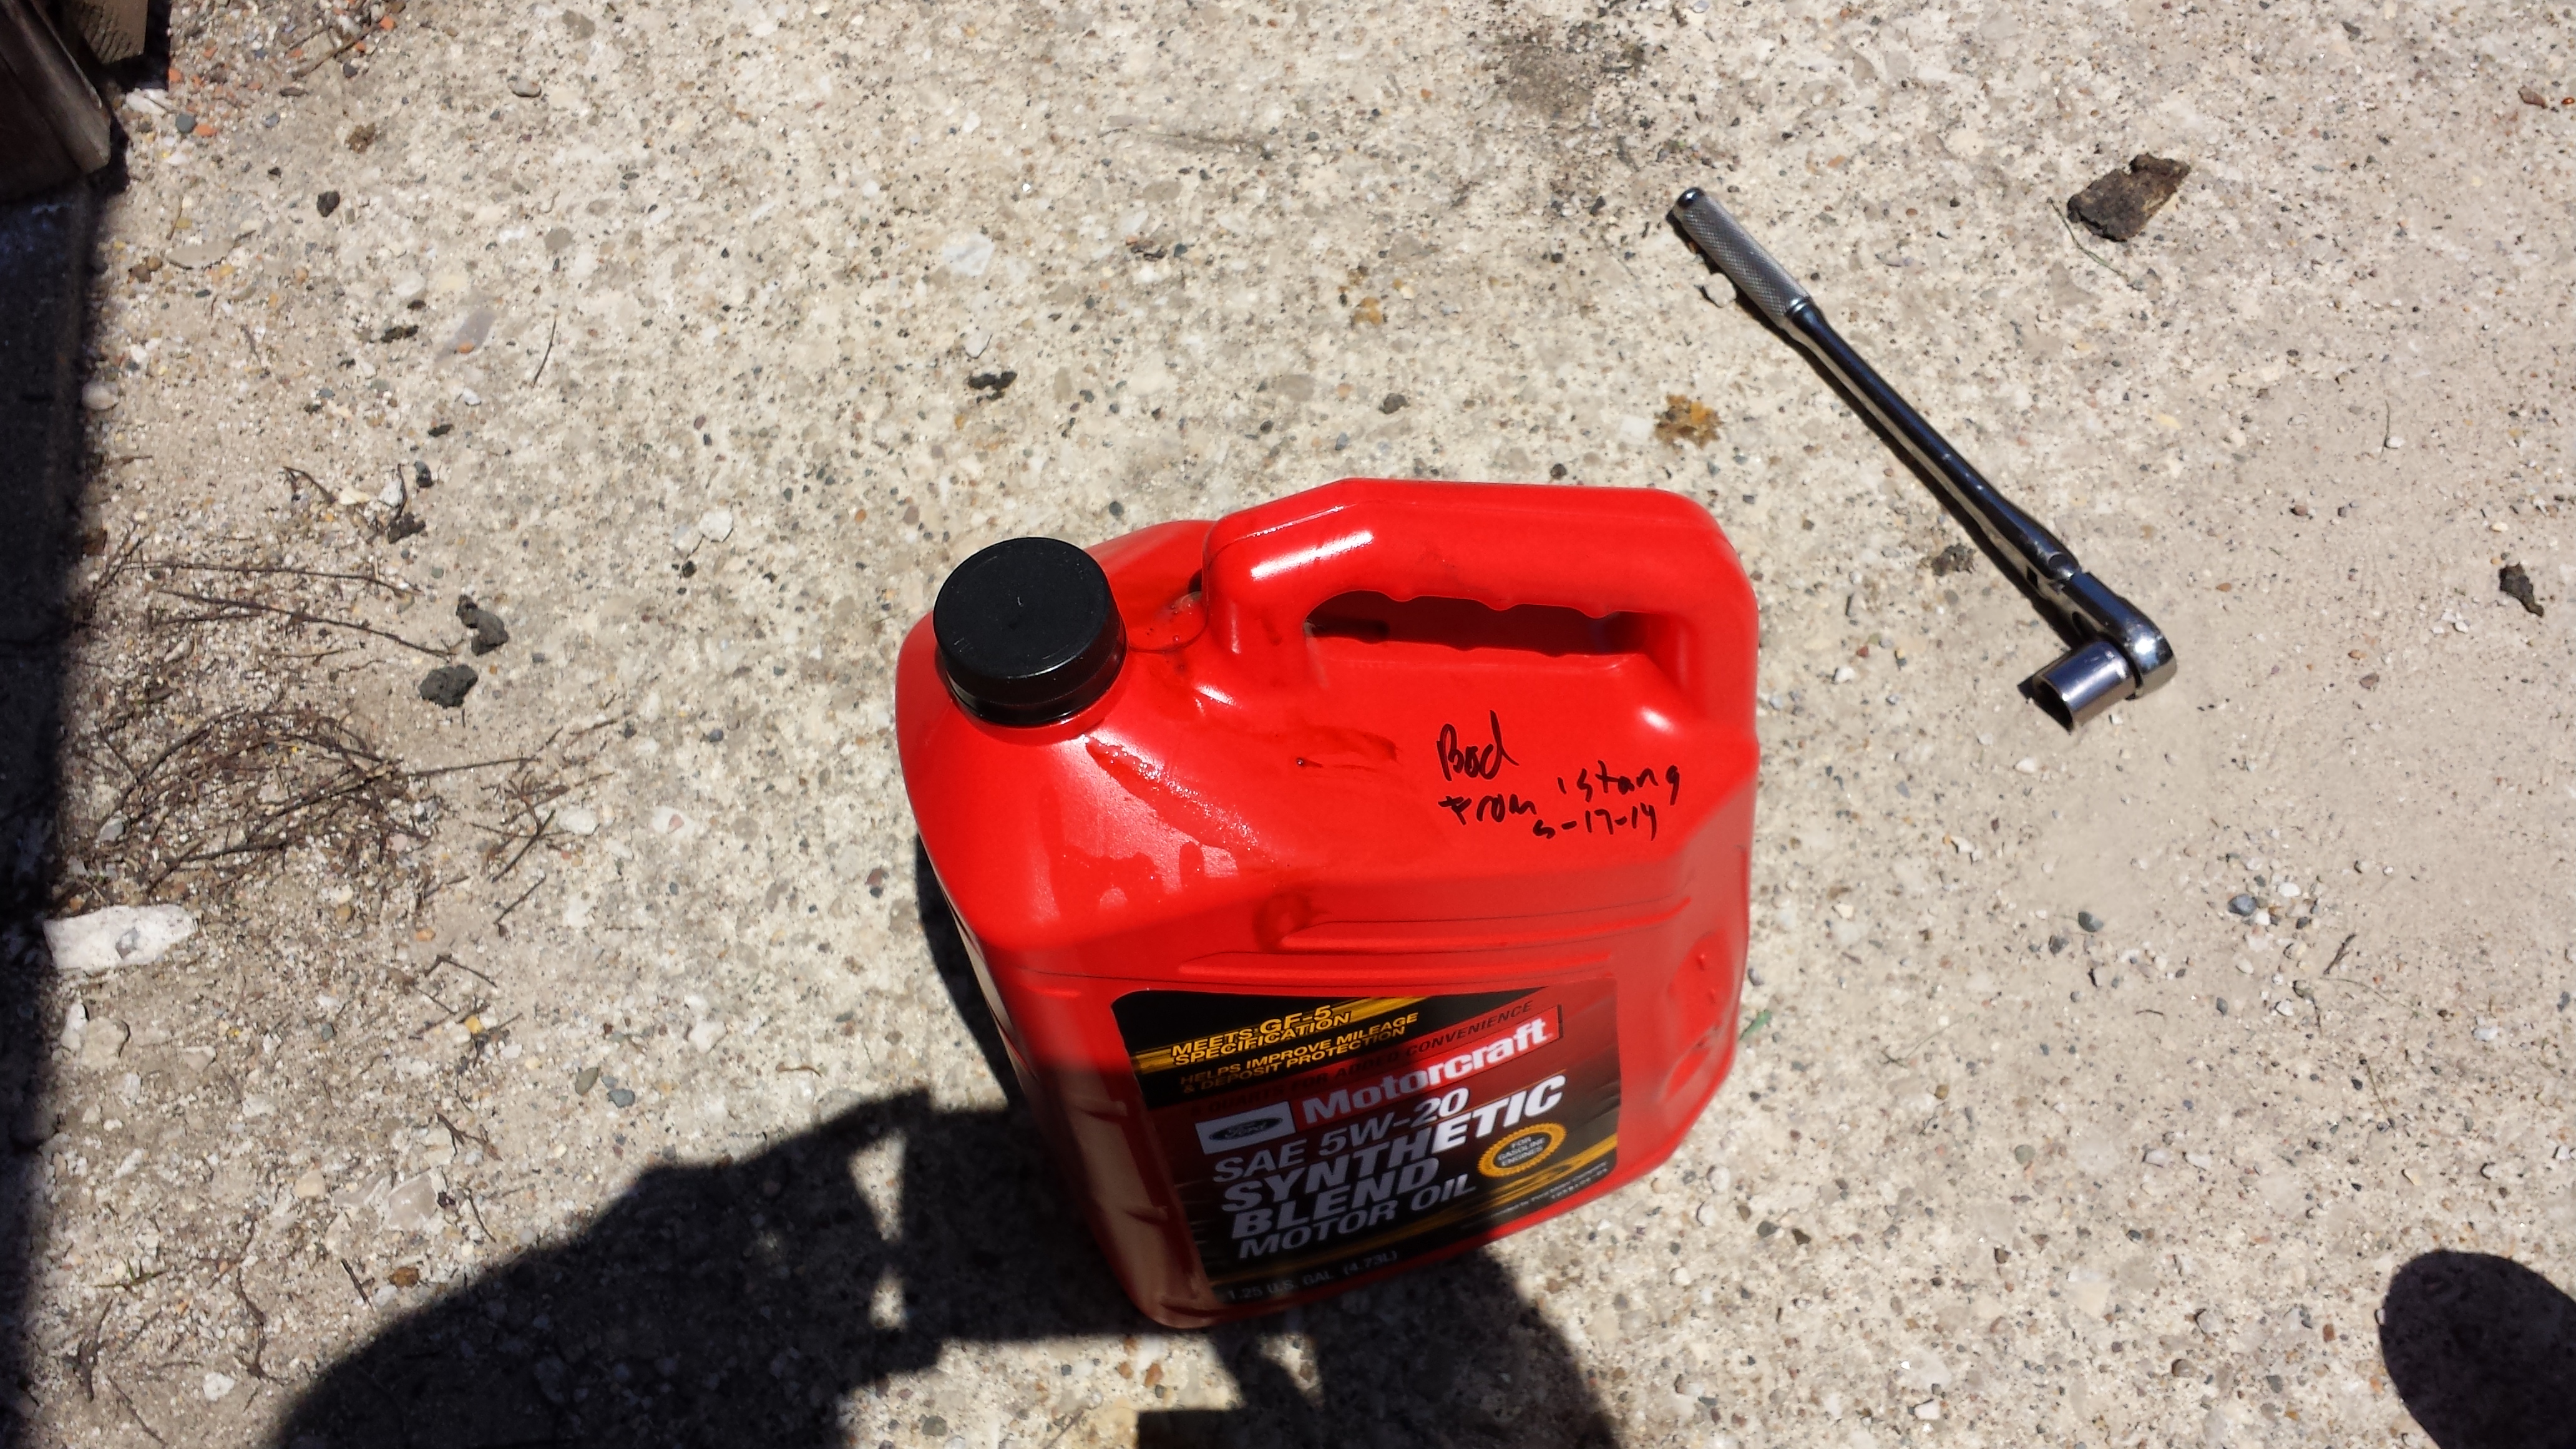
Label bad oil!
It may sound impossible that someone would mistake this old oil for good new oil, but stranger things have definitely happened! Better safe than sorry. Lastly you will need to dispose of your old oil and filter. Usually you should be able to return that to any place that sells oil free of charge.
Hopefully this post has gotten you excited about working on your car. In the future I will investigate some more exciting work. But I think changing your oil is a definitely a good place to start for those who haven’t gotten their hands too dirty yet.

Ready to go!

Thanks, now I know how a oil change happens…..do it myself..umm… thinking about it! Lol.
Hey Sysmoe – Thanks for commenting! Reading through your site you should change your own oil. It can be cheaper than taking it to a shop! The more vehicles you change your own oil, the cheaper it becomes!
I Concur, however all I want to do is drive, The good thing is I learned how it’s done, (thanks to you) so I can “talk shop” the next time it comes up.:)
Hey driving is fun too and mechanics need to make a living! Stay tuned. There will be more tech articles in the future. Next one might be related to headers, exhaust flow and horsepower!
Nice post Axel, but you know, some people still don’t know how to change a wheel :). To my surprise, a few months ago (after New Year’s Eve), I had a flat tire, we were at a cabin, so I didn’t trust my run-flats to get me to the neareast service station, I had to change it. Again, to my surprise most of my friends had no idea about how one would change a tire.
Thanks Raul. You do have a good point. I’ll consider it but I’m not sure how many people want to read a whole article about changing a tire? Here’s a pretty good video tho 🙂 https://www.youtube.com/watch?v=joBmbh0AGSQ
just wanted to post this up after changing oil on my Silverado… this oil filter wrench is my new favorite. i was a long time believer in the strap wrench too, until i changed oil on my fiance’s Hyundai and the filter was in a pocket next to everything! nothing i had could get in there.
then, to my surprise, my Chevy Silverado had a similar situation. everyone needs one of these in their arsenal!!
http://www.summitracing.com/parts/oes-25017?seid=srese1&gclid=CJvpgc_d2L4CFYcDOgod9hwADQ
Hey Rob – Thanks for that. I have never used that type of oil filter wrench before. Maybe I need to work on newer vehicles! – AJH
Rob – I bought one of those filter wrenches you recommended. It worked great on the filter on my 2008 GSXR 600. I couldn’t get the normal band wrench in there because the handle would hit a radiator hose. The wrench allowed me to get in on the end of the filter and turn it right off! – Axel